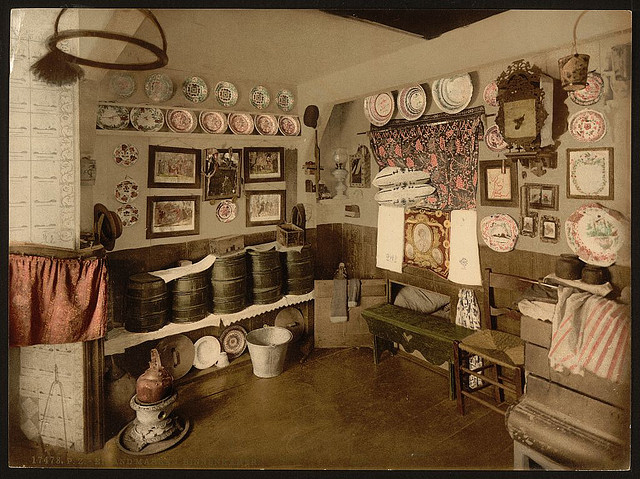
Wednesday, March 21, 2012

Spring Cleaning the Kitchen

I am finally ready to start spring cleaning - doing a deep spring clean doesn't replace the day to day maintenance that I do to keep my home tidy, warm, and inviting. It does, however, help me prepare for the upcoming summer, it helps me clean out out those things that simply never get looked at, and it keeps me from building up clutter for my home. Finally, spring cleaning just is something I find enjoyable as a ritual. It transitions me from the darkness of winter to the light of spring and I have to say that my house, even though the lighting hasn't changed one bit, seems bigger, more airy, and more peaceful after I've scrubbed it.


(Image via)


The room I always start and end with when I am cleaning is the kitchen. Even though our kitchen is a tidy galley kitchen it is still the heart of the home and home base for the rest of the spring clean. I clean it first because it is the place that I go in and out of the most for supplies, washwater, rags, and anything else. The kitchen is generally the most detailed room of the house and will often take the largest part of one of my days but it really sets the tone for cleaning the rest of the house!

When doing deep cleaning it is generally assumed that you start at the top of the room and move down towards the floor so that you don't drip water  or dirt  on the things you have just cleaned. Cleaning, however, has to make logical sense for you so I actually start with the sink and countertops, making sure that the dishrack  and any dishes are done and put away and that I have ample counter space to work on. If you need to modify an order than feel free to do it!


Here is my Kitchen Order:
  1. Do all dishes, dry and put them away.
  2. Clear off the countertops and do a quick clean.
  3. Dust ceiling picture rails, shelves.
  4. Remove ceiling light fixture and clean with warm soapy water in a sink that has been lined with towels (our ca. 1910 fixtures are irreplaceable so I'm very careful when I'm cleaning them.)
  5. Remove one shelf of goods at a time, toss what is not needed, wipe down the shelf and replace when dry for the upper cabinents.
  6. Wipe down the front of the cabinets with warm soapy water.
  7. Empty the top of the fridge, wipe down with warm soapy water. Dust and wash objects and reorganize as needed. 
  8. Empty fridge, clean out inside with warm soapy water (I generally turn off the fridge for this clean) replace objects as needed.
  9. Empty freezer, wipe down inside of freezer, replace objects as needed.
  10. Wipe down the doors and body of the fridge with warm soapy water, shine with glass cleaner. 
  11. Soak and was the antique insulators over the stove, dust the shelf. 
  12. Clean out the warming drawer of the oven, the oven, and the broiler.
  13. Soak and scrub the range top pans and grill.
  14. Clean the stove exterior and shine with Windex. Shine chrome with vinegar/water mixture.
  15. Wipe down walls and tile backsplash with a damp rag.
  16. Empty cupboards and wash with a damp rag. Reorganize and declutter as needed.
  17. Wipe down the front of the cupboards, use vinegar/water mix to shine chrome on rail/handles.

Sunday, March 18, 2012

The Spring Clean: Preparing

Now that we can have the windows open it's the perfect time for a thorough spring clean - I don't like cleaning with the windows shut so as soon as it warms up enough to let the fresh air in I know it's time to get ready to  clean my home.

There are two ways of doing a Spring Clean - the first is to take one or two days and do the entire house at once and the other way is to break it into sections and spread it out over a week or two. Our house is very small, only five rooms and two hallways, so I generally take two days of my life once a year and really, really clean the home well and have it done until the fall touchup. If I lived in a larger home I would probably break it down and do a section or a room a day for a week. It's totally up to you but the principals of Spring Cleaning are the same.

I'm going to do my spring cleaning next week during the first day or two of spring break, so you are welcome to spring-clean-along with me or simply reference this when you decide to clean the individual rooms later in the year. Before we start, though, here are some things that I try to do to prepare for the big scrub.

1. Declutter - I wrote a post on this in Feburary. We've been very busy de-cluttering our home this month and have removed a carload of things from the house. It's really hard to clean around clutter so I try to get rid of it before I clean. No matter what, though, I always end up finding even more stuff to toss  when I'm spring cleaning.

2. Have a spring cleaning schedule written out - My spring cleaning schedule is done by taking each room and dividing it into sections going from the top to the bottom. This isn't making a detailed list for each room, this is more like figuring out what is going to get cleaned and when. For example the first day I will do the Dining Room, Front Hall + Closet, Kitchen and Living Room.The second day I do the Back Hall + Built-Ins, Bathroom, Bedroom + Closet. I expect these to be two eight hour days with breaks as needed and lunch and this is the routine I always have for this apartment. . If I didn't have the time and I was going to break it down it might be something like Monday: Both Bathrooms, Tuesday: Living Room, Wednesday: Kitchen and Dining Room and so on until I had my path mapped out.

3. Make sure you have all of your supplies - Supplies are so important to have on hand. Nothing stops you dead in your tracks like realizing you have no soap or a sponge, or all your cleaning towels are waiting to be washed and you have to do a load of laundry before you can even start cleaning. Each room calls for different sets of supplies though there is a lot of overlap. I grouped this by room simply because it helps me make up a "Bucket" when I'm going to each room and then I don't have to run back and forth trying to find things in the basement, the kitchen, or the bathroom and I have everything in the room I am cleaning. I like to make most of my own supplies or use natural products to clean though I do bleach my ancient sink once a year and use Murphy's Oil Soap on our 100 year old floors that have lost all their finish. For example, I make my own antiseptic soap using a blend of rosemary and lavender essential oils, and go heavy on the lavender for the bedroom. (You can find a recipe here.)

Kitchen:                                  Dining Room:                                   Front/Back Hall:
Antiseptic counter spray             Duster                                               Duster
Vinegar for the chrome              Vinegar for windows/chrome               Wood Friendly Soap
Bleach                                      Newspaper for window cleaning           Rags
Vinyl floor cleaner                    Antiseptic Spray                                  Murphy's Oil Soap
Kitchen Rags                            Rags                                                  Bucket
Duster                                      Murphy's Oil Soap                              Bleach for Cat Boxes
Broom + Dust Pan                    Broom and Dust Pan
Bucket                                     Bucket
                                               Wood-friendly soap for baseboards
                                               Detergent for Curtains  

Living Room:                         Bathroom:                                         Bedroom:
Vacuum                                  Duster                                                Duster
Bucket                                    Bucket                                               Bucket
Rags                                       Rags                                                  Rags
Murphy's Oil Soap                   Antiseptic Soap                                   Broom + Dust Pan
Duster                                     Vinegar                                             Bucket
Newspaper for windows            Tile Floor Cleaner                              Murphy's Oil Soap
Vinegar                                   Bathroom Brush                                 Detergent for Curtains
Wood friendly soap                  Sturdy scrubbing sponge                      Detergent for Bedding
Carpet deodorizer                                                                              Wood friendly soap
Furniture polish                                                                                 Furniture polish
Scratch Cover for Wood                                                                     Scratch cover for wood
Broom + Dust Pan
Detergent for Curtains


Sunday, February 12, 2012

Editing - Preparing for a Spring Clean


There are two stages to a spring clean for us - The first one is editing my home and the second one involves scrubbing it. We have edited regularly for the last three or four years because we have moved on average once or twice a year. This is the first time we've gone into our second year in the same house since I left college so this year I've had to be very deliberate about making sure that I go through a process of really thoroughly editing every nook and cranny, drawer, or hidden cabinet.  

The reason that I edit, or de-clutter, my things before I do a large scrub is that it is simply easier to clean once my  house is de-cluttered. There are fewer things to move around, I've already done some surface cleaning like dusting and sweeping, and I don't have to reorganize as I'm trying to scrub. Organization requires a bit of thought - not too much - but it does help to keep your mind on the practical side of things. 


For example, my husband and I kept our board games up on the highest shelf of the built ins. We have amazing board games that deserve to be played but rarely were because they were out of sight and almost always out of mind. When I reorganized the built ins I placed them on a lower shelf and put the fabric stash up where they were since I don't usually use stash fabrics for projects. Since then we've been playing our games more after dinner which is a great way to have together time and be a little competitive. 

So far, we've been at it three days, going room by room starting at the back of the house (which is the oposite direction I do my 15 minute nightly tidy-ups in) because I know the bedroom and built ins are the places I stash the most clutter and get the least amount of tidying on a regular basis. 


Here are few things to help you get ready for spring clean or any sort of big scrub of your house as well. 

1. Have a visual goal: Every year when I edit my house I have an idea of how I want my house to look - calm, collected, elegant, vintage, a little modern, airy, and light. I keep a board on pinterest  and when it comes time to stage my home or de-clutter/redecorate I can look and see what running themes I have on my board. For example, I noticed that a lot of my pictures have big white rooms (check) with high ceilings (check) and a mix of modern Scandinavian (not so check) and antique (check) furniture. Because I have a clear picture of what I like I can edit out the things I don't like or don't work and arrange my home in such a way that these things are featured. I see what is missing, needs to be updated, and I write it down to make or purchase at a later date. 

2. Start at one end of the house, do one small space at a time:  Editing can be intimidating because you have to make decision after decision about things. I try to keep the overwhelming sense of "I have so much stuff" that hits me when I'm going through closets and storage bins down to a minimum by doing a little at a time. I started by writing down my rooms in order that I want to tackle them. My house is a pre-war 5 room with a front and back hall. It made sense to move in a direction. If your house is larger or you have some rooms that are used more often than others perhaps you'd like to do this in the order of how often they are used or how much is in them getting the rooms with the least amount of clutter done and out of the way first. After I decide the order of rooms I compartmentalize (I generally do this in my head) it into sections. My bedroom is the most overwhelming room to declutter so I broke it down into closet/nightstand/bookcase/under bed/dresser and just tackled each at a time. If you tear apart the whole room you may end up running out of steam with everything in your closet and dressers on your floor and no energy to put it back! 

3. If you don't use it or love it toss it: I believe every organizational guru from Martha to Marla has said this at one point or another but it holds true. Lose the guilt associated with tossing something you paid good money for or the guilt associated with getting rid of a gift and free up a little space in your life. This is one of those things that gets easier with experience. I used to hem and haw about tossing things but now I just go for it and don't worry about it. 

4. Pull out your best things and start using them: One of my favorite ways to cut down on the clutter is to start using my good things and get rid of the seconds. I want to honor my home and family with the good china, cloth napkins, the best dishes, the good linnens, and so on. I don't want to save them because then they are simply clutter pulled out once or twice a year. Even though I still have two sets of dishes (a "good" set and the "regular set") we eat just as many meals on the good set as we do on the regular set and neither set is clutter. Instead of having stacks of paper napkins I use the cloth napkins I have collected  over the years. I wear any and all of my wearable clothes  whenever or wherever instead of saving them for special occasions.

5: Don't bring clutter into the house: This is a hard one for me but I am getting better. I don't bring anything into the house unless I've really thought about where or how I will work it in to my house, wardrobe, or clothing collection and whether or not I think it is truly beautiful or not. I want even the most practical thing in my home to be worthy of a beautiful home. I buy the best quality I can afford, take good care of it, and expect it to last. 

Note: This post has also been posted on my other blog here.